#laravel 5 auth
Explore tagged Tumblr posts
Visit Tumblr Blog
Explore Tumblr blogs with no restrictions, modern design and the best experience.
Last Seen Tumblr Blogs


Fun Fact
Tumblr was named as a finalist in Lead411’s New York City Hot 125 in Aug 2010.
Text
How a Web Development Company Builds Scalable SaaS Platforms
Building a SaaS (Software as a Service) platform isn't just about writing code—it’s about designing a product that can grow with your business, serve thousands of users reliably, and continuously evolve based on market needs. Whether you're launching a CRM, learning management system, or a niche productivity tool, scalability must be part of the plan from day one.
That’s why a professional Web Development Company brings more than just technical skills to the table. They understand the architectural, design, and business logic decisions required to ensure your SaaS product is not just functional—but scalable, secure, and future-proof.
1. Laying a Solid Architectural Foundation
The first step in building a scalable SaaS product is choosing the right architecture. Most development agencies follow a modular, service-oriented approach that separates different components of the application—user management, billing, dashboards, APIs, etc.—into layers or even microservices.
This ensures:
Features can be developed and deployed independently
The system can scale horizontally (adding more servers) or vertically (upgrading resources)
Future updates or integrations won’t require rebuilding the entire platform
Development teams often choose cloud-native architectures built on platforms like AWS, Azure, or GCP for their scalability and reliability.
2. Selecting the Right Tech Stack
Choosing the right technology stack is critical. The tech must support performance under heavy loads and allow for easy development as your team grows.
Popular stacks for SaaS platforms include:
Frontend: React.js, Vue.js, or Angular
Backend: Node.js, Django, Ruby on Rails, or Laravel
Databases: PostgreSQL or MongoDB for flexibility and performance
Infrastructure: Docker, Kubernetes, CI/CD pipelines for automation
A skilled agency doesn’t just pick trendy tools—they choose frameworks aligned with your app’s use case, team skills, and scaling needs.
3. Multi-Tenancy Setup
One of the biggest differentiators in SaaS development is whether the platform is multi-tenant—where one codebase and database serve multiple customers with logical separation.
A web development company configures multi-tenancy using:
Separate schemas per tenant (isolated but efficient)
Shared databases with tenant identifiers (cost-effective)
Isolated instances for enterprise clients (maximum security)
This architecture supports onboarding multiple customers without duplicating infrastructure—making it cost-efficient and easy to manage.
4. Building Secure, Scalable User Management
SaaS platforms must support a range of users—admins, team members, clients—with different permissions. That’s why role-based access control (RBAC) is built into the system from the start.
Key features include:
Secure user registration and login (OAuth2, SSO, MFA)
Dynamic role creation and permission assignment
Audit logs and activity tracking
This layer is integrated with identity providers and third-party auth services to meet enterprise security expectations.
5. Ensuring Seamless Billing and Subscription Management
Monetization is central to SaaS success. Development companies build subscription logic that supports:
Monthly and annual billing cycles
Tiered or usage-based pricing models
Free trials and discounts
Integration with Stripe, Razorpay, or other payment gateways
They also ensure compliance with global standards (like PCI DSS for payment security and GDPR for user data privacy), especially if you're targeting international customers.
6. Performance Optimization from Day One
Scalability means staying fast even as traffic and data grow. Web developers implement:
Caching systems (like Redis or Memcached)
Load balancers and auto-scaling policies
Asynchronous task queues (e.g., Celery, RabbitMQ)
CDN integration for static asset delivery
Combined with code profiling and database indexing, these enhancements ensure your SaaS stays performant no matter how many users are active.
7. Continuous Deployment and Monitoring
SaaS products evolve quickly—new features, fixes, improvements. That’s why agencies set up:
CI/CD pipelines for automated testing and deployment
Error tracking tools like Sentry or Rollbar
Performance monitoring with tools like Datadog or New Relic
Log management for incident response and debugging
This allows for rapid iteration and minimal downtime, which are critical in SaaS environments.
8. Preparing for Scale from a Product Perspective
Scalability isn’t just technical—it’s also about UX and support. A good development company collaborates on:
Intuitive onboarding flows
Scalable navigation and UI design systems
Help center and chatbot integrations
Data export and reporting features for growing teams
These elements allow users to self-serve as the platform scales, reducing support load and improving retention.
Conclusion
SaaS platforms are complex ecosystems that require planning, flexibility, and technical excellence. From architecture and authentication to billing and performance, every layer must be built with growth in mind. That’s why startups and enterprises alike trust a Web Development Company to help them design and launch SaaS solutions that can handle scale—without sacrificing speed or security.
Whether you're building your first SaaS MVP or upgrading an existing product, the right development partner can transform your vision into a resilient, scalable reality.
0 notes
Text
How to Prevent Business Logic Vulnerabilities in Laravel Apps
Introduction
Business Logic Vulnerabilities (BLVs) are some of the most subtle and critical issues that developers can overlook in Laravel applications. These vulnerabilities can lead to unauthorized access, data manipulation, and other serious security risks if not addressed properly.

In this blog post, we will dive deep into Business Logic vulnerabilities in Laravel, show you common examples, and walk you through the steps to prevent them with practical coding solutions. We’ll also introduce our Website Vulnerability Scanner tool to help you scan your Laravel application for vulnerabilities in real time.
What Are Business Logic Vulnerabilities?
Business Logic vulnerabilities occur when an application’s business rules, workflows, or logic can be bypassed or manipulated by an attacker. Unlike traditional security issues such as SQL injection or cross-site scripting (XSS), these vulnerabilities are often more complex because they are based on the specific design of your application.
Example: Insecure Transaction Logic
Consider a banking application where users are allowed to withdraw money. If the system doesn't properly validate the user's account balance before processing the withdrawal, a user could manipulate the application logic to withdraw more money than they actually have.
How to Prevent Business Logic Vulnerabilities in Laravel
Laravel is a powerful framework, but it’s essential to carefully design and validate the logic of your application to avoid vulnerabilities.
1. Enforcing Authorization at Every Level
To prevent unauthorized access, always ensure that authorization checks are performed at each level of your application. For instance, a user should only be able to access their own data, and not that of other users.
public function viewUserProfile($id) { $user = User::findOrFail($id); // Check if the current user is the owner if (auth()->user()->id !== $user->id) { abort(403, 'Unauthorized action.'); } return view('profile', compact('user')); }
This example ensures that only the user who owns the profile can access it.
2. Using Request Validation
Always validate user inputs, especially when dealing with critical business operations like payments, transfers, or product purchases.
$request->validate([ 'amount' => 'required|numeric|min:10', // Minimum withdrawal of 10 units 'recipient_id' => 'required|exists:users,id', ]); // Process the transfer if validation passes $transaction = Transaction::create([ 'user_id' => auth()->id(), 'amount' => $request->input('amount'), 'recipient_id' => $request->input('recipient_id'), ]);
This ensures that no invalid or malicious data is processed by your application.
3. Implementing Rate Limiting
Rate limiting can prevent attackers from abusing your endpoints and triggering unwanted actions. Laravel provides an easy way to set up rate limiting.
use Illuminate\Cache\RateLimiter; public function register() { RateLimiter::for('login', function (Request $request) { return Limit::perMinute(5)->by($request->email); }); }
In this example, users are limited to five login attempts per minute, preventing brute-force attacks or abuse of business logic.
Use Our Free Website Security Checker
To assist in identifying Business Logic vulnerabilities, we offer a free tool for a Website Security test that you can use on your Laravel project. This tool scans your application for various security risks, including Business Logic vulnerabilities, and provides a detailed report of potential issues.
Check your Laravel app now!

Screenshot of the free tools webpage where you can access security assessment tools.
Sample Vulnerability Report
Once you've scanned your site, the tool will generate a vulnerability assessment report, which provides detailed information about identified risks. Here's an example of a report that highlights potential Business Logic flaws.

An Example of a vulnerability assessment report generated with our free tool, providing insights into possible vulnerabilities.
Conclusion
Business Logic Vulnerabilities in Laravel can pose significant risks to your application’s security and integrity. By carefully validating inputs, enforcing proper authorization checks, and limiting abuse, you can protect your Laravel applications from these vulnerabilities.
Don't forget to regularly use our Free Website Security Scanner tool to scan your applications for vulnerabilities and secure your Laravel project.
For more in-depth articles and security tips, visit the Pentest Testing Corp Blog.
Additional Resources:
Prevent Buffer Overflow in OpenCart
Fix Weak SSL/TLS Configuration in OpenCart
Prevent Command Injection in TypeScript
This blog post provides practical coding examples and highlights the importance of securing business logic in Laravel applications. With the added value of our Website Security Checker, you can now actively assess your application's vulnerabilities.
1 note
·
View note
Text
Laravel 9 Bootstrap 5 Auth Scaffolding
New Post has been published on https://www.codesolutionstuff.com/laravel-9-bootstrap-5-auth-scaffolding/
Laravel 9 Bootstrap 5 Auth Scaffolding

I'll show you how to make a Bootstrap 5 Auth Scaffolding in Laravel 9 in this tutorial. Auth Scaffolding uses the Laravel UI package to create a user registration, login, dashboard, logout, reset password, and email verification. Let's get started on Laravel 9 Boostrap 5 Auth Scaffolding right
0 notes
Text
Laravel 5.8 Tutorial From Scratch - e23 - Adding a Custom Middleware
Laravel 5.8 Tutorial From Scratch – e23 – Adding a Custom Middleware
[ad_1] Now that we know how to apply one of the default middlewares, let’s take the time to create our own custom middleware for our app. Follow along as we talk about all of the ways you can add a middleware, from global, to web groups to individual routes.
For the best experience, follow along in our interactive school at https://www.coderstape.com
Resources Course Source Code https://github.com…
View On WordPress
#Laravel#laravel 5 auth#laravel 5.8#laravel 5.8 authentication#laravel 5.8 custom middleware#laravel 5.8 feature#laravel 5.8 features#laravel 5.8 global middleware#laravel 5.8 middleware#laravel 5.8 multi auth#laravel 5.8 user auth#laravel 5.8 user authentication#laravel auth#laravel authentication#laravel custom middleware#laravel from the ground up#laravel global middleware#laravel middleware#laravel registration#laravel route group middleware
0 notes
Text
Laravel 9 Bootstrap 5 Auth Scaffolding - CodeSolutionStuff
#artificial intelligence#Programming#php#cloud#machine learning#laravel#codesolutionstuff#codesolution#JavaScript#DataScience#MachineLearning#Analytics#AI#ML#angular#Tech#Python#ReactJS#DataScientist#Coding#SQL#bot#Cloud#Typescript#Github#Data#BigData#DL#machinelearning
0 notes
Text
How To Use Chart JS In Laravel

The fundamentals of Chart.js are quite straightforward. First, we must install Chart.js into our project. Depending on the settings of your project, you may be installing it using npm or bower, or you may link to a constructed version via a CDN or clone/build from GitHub. Simply connecting to the created CDN version in the sample's blade file would suffice for this brief example. A The fundamentals of Chart js are quite straightforward. First, we must install Chart js into our project. Depending on the settings of your project, you may be installing it using npm or bower, or you may link to a constructed version via a CDN or clone/build from GitHub. In our examples, we'll only link to the built-in CDN version for the purposes of this brief demonstration. We'll just plot the ages of the app users in this case. We're presuming you've already set up the Laravel auth scaffolding and carried out the required migrations to make a Users table. If not, take a look at the information here or modify it for the model you're using for your chart's data. Therefore, before creating any users at random, we'll first add an age column to our Users table. For more information, see our post on how to use faker to create random users, however for this demonstration, let's make a database migration to add an age column by using: add age to users table php artisan make:migration —table='users' To change the up function to: edit this file in the database migrations directory. Schema::table('Users', function (Blueprint $table) { $table->int('age')->nullable(); }); Run php artisan migrate after that, and your Users table should now contain an age column. Visit /database/factories/UserFactory now, and add the following at the end of the array: 'age' is represented by $faker->numberBetween($min = 20, $max = 80), The complete return is thus: return ; Run the following commands to build a UsersTableSeeder: make:seeder UsersTableSeeder in PHP This will produce UsersTableSeeder.php in the database. The run function should include the following: factory(AppUser::class, 5)->create(); When this is executed, 5 users will be created; modify 5 to the number of users you need. After that, we must open DatabaseSeeder.php in /database/seeds and uncomment the code in the run() function. Finally, execute php artisan db:seed. Five new users should appear, each of whom has an age. For our Charts page, we will now develop a model, controller, views, and routes. Run the following command in PHP: make:controller ChartController —model=Chart. To the file /app/Http/Controllers/ChartController.php, add the following: use AppUser; use AppChart; use DB; ... public function index() { // Get users grouped by age $groups = DB::table('users') ->select('age', DB::raw('count(*) as total')) ->groupBy('age') ->pluck('total', 'age')->all(); // Generate random colours for the groups for ($i=0; $ilabels = (array_keys($groups)); $chart->dataset = (array_values($groups)); $chart->colours = $colours; return view('charts.index', compact('chart')); } The random colour scheme is one example of the exciting things you can do with the controller's data, though you can also specify hardcoded colours if you'd choose. In /resources/views/charts/, we must now create an index.blade.php file and add the following (depending on your blade setup and layout; here is an example): Laravel Chart Example Chart Demo Finally, we need to add the following to /routes/web.php: Route::get('/charts', 'ChartController@index')->name('charts'); Go to at your-project-name.test/charts now. Although this should serve as a good starting point for your understanding of the fundamentals of charts and graphs in Laravel, you may refer to the Chart.js documentation for more details on customizing your charts. Read the full article
0 notes
Text
How to Create Auth using Scaffolding in Laravel 9 Bootstrap?
How to Create Auth using Scaffolding in Laravel 9 Bootstrap?
Today now in this article i will show you in detail on laravel 9 install bootstrap 5. And Also let’s discuss about laravel 9 bootstrap auth scaffolding. if you have any question about how to installing bootstrap 5 in laravel 9 then here I will give a very simple example also with a solution. if you have any question about the laravel 9 authentication by using scaffolding with the bootstrap then…
View On WordPress
0 notes
Text
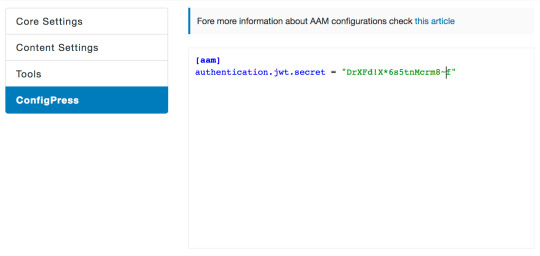
Jwt Secret Key Laravel
Jwt Secret Key Laravel Free
Jwt Secret Key Laravel Download
Secret Key Indonesia
Secret Key Rotom
Throughout this tutorial, we’ll be learning how to authenticate REST APIs using JWT in the latest Laravel 8 version. You will learn how to create a REST API using Laravel 8 with JWT authentication.
Laravel 6 Rest API using JWT Authentication. JWT authentication provides a secure way to transmit data between the client and server using Laravel APIs. In this post, we will look at how we can create a JWT authentication for a Laravel based API. API’s provide a fluent interface to communicate with the different type of services. Step 5 — Generating a JWT Secret Key. After configuring JWT authentication in our Laravel 8 app. We’ll need to generate a JWT secret key in this step. Head over to your terminal and run the following command to generate the JWT secret key: $.
We’ll see how to set up JWT authentication in Laravel 8 and implement a secured REST API using the tymon/jwt-auth package.
Laravel 8 JWT Authentication Tutorial by Example
In this tutorial, we’ll see step by step to implement a REST API with PHP and Laravel 8 with authentication via JWT tokens.
Step 1 — Creating a Laravel 8 Application
Let’s start our tutorial by creating a Laravel 8 application using Composer — the dependency management tool for PHP developers.
Head over to a new command-line interface and run the following command:
Step 2 — Configuring a MySQL Database
After creating your Laravel 8 application using Composer, let’s configure a MySQL database in our second step.
Open the .env file located in the root of your Laravel 8′ application. Next, add the following database configuration information:
Step 3 — Installing jwt-laravel
Now that we have a Laravel 8 application with a MySQL database configured, let’s start implementing JWT authentication by installing the jwt-auth package.
Head back to your terminal and run the following command from the root of your project’s folder:
Step 4 — Setting up JWT Authentication in Laravel 8
At this step, we have a Laravel 8 application with MySQL configured. We also installed the jwt-auth library in the previous step. Now, let’s set up JWT authentication in our application.
Head to the config/app.php file and add JWT providers and aliases as follows:
Next, head back to your terminal and run the following command:
Step 5 — Generating a JWT Secret Key
After configuring JWT authentication in our Laravel 8 app. We’ll need to generate a JWT secret key in this step.
Head over to your terminal and run the following command to generate the JWT secret key:
Next, open the vendor/tymon/src/Commands/JWTGenerateCommand.php and update it as follows:
Step 6 — Implementing JWT Authentication in Laravel 8 User Model
After configuring JWT in Laravel 8. In this step, we’ll implement it in the User model.
Open the App/User.php file, and update it as follows:
Step 7 — Implementing the REST API Controller for JWT Authentication
Let’s now implement a Laravel 8 controller for handling JWT authentication in our REST API application.
Head back to your terminal and run the following command to generate a controller:
Next, open the app/http/controllers/JwtAuthController.php file, and add the following methods:
Step 7 — Add Laravel 8 REST API Routes
Now that we have implemented JWT authentication in our Laravel 8 User model. In this step, we’ll proceed to create our REST API routes.
Open the routes/api.php file, and update it as follows:
Step 9 — Serving your Laravel 8 REST API Authentication App
After implementing JWT authentication in our Laravel 8 REST API application, let’s run our local development server using the following command:
Conclusion
Throughout this tutorial, we’ve seen step by step how to implement JWT authentication to secure and protect your REST API endpoints created with PHP and Laravel 8.
This post was originally posted on https://shabang.dev/laravel-8-rest-api-authentication-with-jwt-tutorial-by-example/
Throughout this tutorial, we’ll be learning how to authenticate REST APIs using JWT in the latest Laravel 8 version. You will learn how to create a REST API using Laravel 8 with JWT authentication.
We’ll see how to set up JWT authentication in Laravel 8 and implement a secured REST API using the tymon/jwt-auth package.
Laravel 8 JWT Authentication Tutorial by Example
In this tutorial, we’ll see step by step to implement a REST API with PHP and Laravel 8 with authentication via JWT tokens.
Step 1 — Creating a Laravel 8 Application
Let’s start our tutorial by creating a Laravel 8 application using Composer — the dependency management tool for PHP developers.
Head over to a new command-line interface and run the following command:
Step 2 — Configuring a MySQL Database
After creating your Laravel 8 application using Composer, let’s configure a MySQL database in our second step.
Open the .env file located in the root of your Laravel 8′ application. Next, add the following database configuration information:
Step 3 — Installing jwt-laravel
Now that we have a Laravel 8 application with a MySQL database configured, let’s start implementing JWT authentication by installing the jwt-auth package.
Head back to your terminal and run the following command from the root of your project’s folder:
Step 4 — Setting up JWT Authentication in Laravel 8
At this step, we have a Laravel 8 application with MySQL configured. We also installed the jwt-auth library in the previous step. Now, let’s set up JWT authentication in our application.
Head to the config/app.php file and add JWT providers and aliases as follows:
Next, head back to your terminal and run the following command:
Jwt Secret Key Laravel Free
Step 5 — Generating a JWT Secret Key
After configuring JWT authentication in our Laravel 8 app. We’ll need to generate a JWT secret key in this step.
Head over to your terminal and run the following command to generate the JWT secret key:
Next, open the vendor/tymon/src/Commands/JWTGenerateCommand.php and update it as follows:
Step 6 — Implementing JWT Authentication in Laravel 8 User Model
After configuring JWT in Laravel 8. In this step, we’ll implement it in the User model.
Open the App/User.php file, and update it as follows:
Step 7 — Implementing the REST API Controller for JWT Authentication
Let’s now implement a Laravel 8 controller for handling JWT authentication in our REST API application.
Head back to your terminal and run the following command to generate a controller:
Next, open the app/http/controllers/JwtAuthController.php file, and add the following methods:
Step 7 — Add Laravel 8 REST API Routes
Now that we have implemented JWT authentication in our Laravel 8 User model. In this step, we’ll proceed to create our REST API routes.
Open the routes/api.php file, and update it as follows:
Jwt Secret Key Laravel Download
Step 9 — Serving your Laravel 8 REST API Authentication App
After implementing JWT authentication in our Laravel 8 REST API application, let’s run our local development server using the following command:
Secret Key Indonesia
Conclusion
Secret Key Rotom
Throughout this tutorial, we’ve seen step by step how to implement JWT authentication to secure and protect your REST API endpoints created with PHP and Laravel 8.
This post was originally posted on https://shabang.dev/laravel-8-rest-api-authentication-with-jwt-tutorial-by-example/
0 notes
Photo

EMERGE Infotech is a full-fledged digital marketing, IT and E-commerce solution provider. We ensure to deliver unique and impeccable integrated digital marketing strategy to our clients' brand. EMERGE Infotech provides end-to-end digital marketing solution which includes building and launching a new brand from the scratch, promoting the brand and expanding the market. Job Description: 1) Develop, record and maintain cutting edge web-based PHP applications. 2) Develop and maintain code written in core PHP and HTML/JQuery/Bootstrap 3) Build modern, innovative applications with excellent user experience (UX) 4) Ensure HTML, CSS, and shared JavaScript is valid and consistent across applications 5) Prepare and maintain all applications utilizing standard development tools 6) Lead the entire web application development life cycle right from concept stage to delivery and post launch support 7) Refactor, optimize and improve the existing codebase for maintenance and scale 8) Interface with customer and internal teams to gather requirements and develop software solutions 9) Convey effectively all task progress, evaluations, suggestions, schedules along with technical and process issues 10) Document the development process, architecture, and standard components 11) Coordinate with co-developers and keeps project manager well informed of the status of development effort, Keep abreast of new trends and best practices in web development Desired Candidate Profile- - Work experience as a PHP web developer for up-to 3 years - Proficient in PHP, HTML5, JavaScript, CSS, JQuery, Bootstrap- Skilled modern HTML5 design and preparation of themes and layouts - Understanding of mobile first design and development strategies - Knowledge in Node.js, React, AngularJS web development will be a plus - Skilled in MySQL/PostgreSQL/MongoDB database design, writing efficient database queries, fine tuning and improving query performance - Experience with PHP frameworks (CodeIgniter, Laravel, Zend. etc ) - Knowledge in website optimization, SEO and performance tuning - Good understanding of API integration and auth technologies - Ready to join immediately or on short notice Send your resume to [email protected] www.emergeinfotech.com
0 notes
Text
Fixing Insufficient Logging and Monitoring in Laravel
Insufficient logging and monitoring is a common vulnerability that can lead to missed or delayed detection of security incidents in web applications. In this blog, we’ll explore how Laravel developers can mitigate this issue with practical coding examples and introduce a free Website Security checker tool to evaluate your website's vulnerabilities.

What is Insufficient Logging and Monitoring?
Insufficient logging and monitoring occur when an application fails to:
Record critical events like authentication attempts, permission changes, or system errors.
Generate alerts for unusual activities.
Monitor logs for anomalies or breaches.
Without proper logging and monitoring, organizations may remain unaware of attacks, compromising their ability to respond to and mitigate potential damage.
Impact of Insufficient Logging and Monitoring
Delayed Incident Response: Attack detection is slower, giving attackers more time to exploit vulnerabilities.
Compliance Issues: Many regulations (e.g., GDPR, HIPAA) mandate robust monitoring systems.
Reputation Damage: Customers lose trust after unreported breaches.
How Laravel Handles Logging
Laravel uses the powerful Monolog library for logging, supporting multiple log handlers such as files, databases, or external tools like Slack. Laravel’s configuration files for logging are stored in:
config/logging.php
Steps to Mitigate Insufficient Logging and Monitoring
Enable Detailed Logging Configure logging levels based on your environment. Laravel supports levels like debug, info, notice, warning, error, etc. Example: Setting Up Logging in Laravel In the config/logging.php file:
return [ 'default' => env('LOG_CHANNEL', 'stack'), 'channels' => [ 'stack' => [ 'driver' => 'stack', 'channels' => ['daily'], ], 'daily' => [ 'driver' => 'daily', 'path' => storage_path('logs/laravel.log'), 'level' => 'debug', // Adjust as needed 'days' => 14, ], ], ];
This setup logs events daily and retains logs for 14 days.
Log Critical Events Ensure important actions are logged. For example, log login attempts and failed logins:
use Illuminate\Support\Facades\Log; // Successful Login Log::info('User logged in', ['user_id' => auth()->id()]); // Failed Login Log::warning('Failed login attempt', ['email' => request('email')]);
Monitor Logs and Generate Alerts Use tools like Laravel Telescope to monitor logs. Install Telescope via Composer:
composer require laravel/telescope
Publish its assets:
php artisan telescope:install php artisan migrate
Enable Telescope in production by modifying the telescope.php configuration file.
Using Free Tools for Security Checks
To ensure your Laravel application’s logging and monitoring setup is effective, it’s crucial to identify potential vulnerabilities. Our Website Security Scanner can help.

Screenshot of the free tools webpage where you can access security assessment tools.
Real-World Example: Logging Suspicious Activity
Here’s how to log suspicious activity in Laravel:
use Illuminate\Support\Facades\Log; // Log suspicious activity function detectSuspiciousActivity($user) { if ($user->login_attempts > 5) { Log::alert('Suspicious login activity detected', [ 'user_id' => $user->id, 'email' => $user->email, ]); } }
Sample Vulnerability Report
Using our tool, you can generate a detailed vulnerability assessment report, highlighting areas like insufficient logging.

An example of a vulnerability assessment report generated with our free tool provides insights into possible vulnerabilities.
Conclusion
Insufficient logging and monitoring are critical vulnerabilities that developers must address to ensure their Laravel applications remain secure. By implementing proper logging, monitoring logs, and using tools like Laravel Telescope, you can mitigate risks effectively.
Don’t wait—try our free Website Security Checker tool today to identify vulnerabilities in your application and improve your security posture!
#cyber security#cybersecurity#data security#pentesting#security#the security breach show#laravel#php#logging#monitoring#sql
1 note
·
View note
Text
Trọn bộ câu hỏi tuyển dụng Laravel cùng đáp án bạn nên biết

1. Trọn bộ câu hỏi câu hỏi phỏng vấn laravel cơ bản bạn nên biết 1.1. Câu hỏi 1: Bạn hãy cho biết laravel là gì? Đây được xem là câu hỏi cơ bản mà bất kỳ ứng viên nào cũng phải trả lời được. Laravel được hiểu là một khung làm việc, khung web PHP sử dụng mã nguồn mở v�� miễn phí, được sáng lập bởi Taylor Otwell. Khung làm việc này đặc biệt sử dụng cho việc phát triển các ứng dụng trang web theo mô hình điều khiến MVC. 1.2. Câu hỏi 2: Trình bày sự khác biệt cơ bản giữa khung Laravel 4 và Laravel 5.x là gì? Đây là câu hỏi chuyên ngành đầu tiên mà nhà tuyển dụng hỏi tới ứng viên của mình. Để trả lời tốt, chuẩn xác câu hỏi này bạn sẽ cần cung cấp những thông tin cơ bản sau: Trình bày cơ bản và tóm tắt thông tin Laravel 5.0 bao gồm các nội dung: - Thư mục ứng dụng/ mô hình cũ đã bị xóa hoàn toàn. - Bộ điều khiển, phần mềm trung gian và yêu cầu (một loại lớp mới trong Laravel 5.0) hiện được nhóm trong thư mục ứng dụng/ http. - Thư mục ứng dụng/ Nhà cung cấp mới thay thế tệp ứng dụng/ bắt đầu từ các phiên bản trước của Laravel 4.x. - Các tập tin và khung nhìn ngôn ngữ ứng dụng đã được chuyển đến thư mục tài nguyên. - Tất cả các thành phần chính của Laravel đều thực hiện các giao diện được đặt trong kho. - Tuyến mới: bộ đệm Artisan lệnh để tăng tốc đáng kể việc đăng ký các tuyến của bạn. - Hiện tại, Laravel 5 hỗ trợ phần mềm trung gian HTTP và các "bộ lọc" xác thực và CSRF đi kèm đã được chuyển đổi thành phần mềm trung gian. - Có thể phụ thuộc kiểu gợi ý vào các phương thức điều khiển. - Bộ điều khiển đăng ký, xác thực và đặt lại mật khẩu người dùng hiện được bao gồm trong hộp, cũng như các chế độ xem tương ứng đơn giản, được đặt tại tài nguyên/ lượt xem/ auth. - Ngoài định dạng công việc hàng đợi được hỗ trợ trong Laravel 4, Laravel 5 cho phép bạn thể hiện các công việc được xếp hàng của mình dưới dạng các đối tượng lệnh đơn giản. Các lệnh này sống trong thư mục Ứng dụng/ Lệnh. - Trình điều khiển hàng đợi cơ sở dữ liệu hiện được bao gồm trong Laravel, cung cấp trình điều khiển hàng đợi cục bộ đơn giản, không yêu cầu cài đặt gói bổ sung ngoài phần mềm cơ sở dữ liệu của bạn. - Bộ lập lịch lệnh của Laravel cho phép bạn xác định một cách trôi chảy và rõ ràng lịch trình lệnh của mình trong chính Laravel và chỉ cần một mục Cron duy nhất trên máy chủ của bạn. - Lệnh tinker nghệ nhân php hiện sử dụng Psysh bởi Justin Hileman, một REPL ...
Xem nguyên bài viết tại: Trọn bộ câu hỏi tuyển dụng Laravel cùng đáp án bạn nên biết
0 notes
Text
Laravel 5.8 Tutorial From Scratch - e24 - URL Helpers - Laravel
Laravel 5.8 Tutorial From Scratch – e24 – URL Helpers – Laravel
Laravel 5.8 Tutorial From Scratch – e24 – URL Helpers – Laravel
[ad_1]
In this episode, we explore the 3 URL Helpers offered by Laravel out of the box and refactor our project to use them.
For the best experience, follow along in our interactive school at https://www.coderstape.com
Resources Course Source Code https://github.com/coderstape/laravel-58-from-scratch
Hit us up on Twitter with any…
View On WordPress
#laravel 5 auth#laravel 5.8#laravel 5.8 authentication#laravel 5.8 feature#laravel 5.8 features#laravel 5.8 multi auth#laravel 5.8 named resource routes#laravel 5.8 named routes#laravel 5.8 user auth#laravel 5.8 user authentication#laravel auth#laravel authentication#laravel from the ground up#laravel middleware#laravel named resource routes#laravel named routes#laravel registration#laravel route group middleware#laravel routing with parameters
0 notes
Link
Nuxt.js provides an Axios module for easy integration with your application. Axios is a promise-based HTTP client that works in the browser and Node.js environment or, in simpler terms, it is a tool for making requests (e.g API calls) in client-side applications and Node.js environment. In this tutorial, we’re going to learn how to use the Axios module and how to make a request on the server-side using asyncData and fetch. These two methods make a request on the server-side but they have some differences which we’re also going to cover. Finally, we’ll learn how to perform authentication and secure pages/routes using the auth module and auth middleware. This article requires basic knowledge of Nuxtjs and Vuejs as we’ll be building on top of that. For those without experience with Vuejs, I recommend you start from their official documentation and the Nuxt official page before continuing with this article.
What Is The Nuxt.js Axios Module?
According to the official Documentation,
“It is a Secure and easy Axios integration with Nuxt.js.���
Here are some of its features:
Automatically set base URL for client-side & server-side.
Proxy request headers in SSR (Useful for auth).
Fetch Style requests.
Integrated with Nuxt.js Progressbar while making requests.
To use the axios module in your application, you will have to first install it by using either npm or yarn. YARN
yarn add @nuxtjs/axios
NPM
npm install @nuxtjs/axios
Add it into your nuxt.config.js file:
modules: [ '@nuxtjs/axios', ], axios: { // extra config e.g // BaseURL: 'https://link-to-API' }
The modules array accepts a list of Nuxt.js modules such as dotenv, auth and in this case, Axios. What we’ve done is to inform our application that we would be using the Axios module, which we reference using @nuxtjs/axios. This is then followed by the axios property which is an object of configurations like the baseURL for both client-side and server-side. Now, you can access Axios from anywhere in your application by calling this.$axios.method or this.$axios.$method. Where method can be get, post, or delete.
Making Your First Request Using Axios
For this tutorial, I’ve put together a simple application on Github. The repository contains two folders, start and finish, the start folder contains all you need to get right into the tutorial. The finish folder contains a completed version of what we would be building. After cloning the repo and opening the start folder, we would need to install all our packages in the package.json file so open your terminal and run the following command:
npm install
Once that is done, we can start our app using the npm run dev command. This is what you should see when you go to localhost:3000.
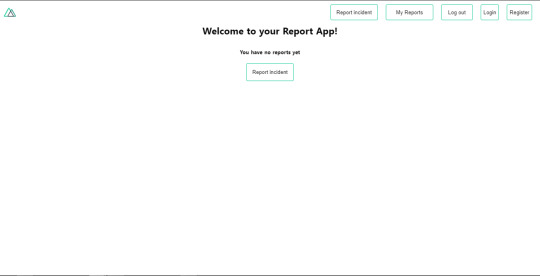
Our application’s landing page. (Large preview)
The next thing we have to do is to create a .env file in the root folder of our application and add our API URL to it. For this tutorial, we’ll be using a sample API built to collect reports from users.
API_URL=https://ireporter-endpoint.herokuapp.com/api/v2/
This way, we do not have to hard code our API into our app which is useful for working with two APIs (development and production). The next step would be to open our nuxt.config.js file and add the environmental variable to our axios config that we added above.
/* ** Axios module configuration */ axios: { // See https://github.com/nuxt-community/axios-module#options baseURL: process.env.API_URL, },
Here, we tell Nuxt.js to use this baseURL for both our client-side and server-side requests whenever we use this Axios module. Now, to fetch a list of reports, let us open the index.vue file and add the following method to the script section.
async getIncidents() { let res = await this.$store.dispatch("getIncidents"); this.incidents = res.data.data.incidents; }
What we have done is to create an async function that we call getIncidents() and we can tell what it does from the name — it fetches a list of incidents using the Vuex store action method this.$store.dispatch. We assign the response from this action to our incidents property so we can be able to make use of it in the component. We want to call the getIncidents() method whenever the component mounts. We can do that using the mounted hook.
mounted() { this.getIncidents() }
mounted() is a lifecycle hook that gets called when the component mounts. That will cause the call to the API to happen when the component mounts. Now, let us go into our index.js file in our store and create this action where we’ll be making our Axios request from.
export const actions = { async getIncidents() { let res = await this.$axios.get('/incidents') return res; } }
Here, we created the action called getIncidents which is an async function, then we await a response from the server and return this response. The response from this action is sent back to our getIncidents() method in our index.vue file. If we refresh our application, we should now be able to see a long list of incidents rendered on the page.
List of incidents on landing page. (Large preview)
We have made our first request using Axios but we won’t stop there, we are going to be trying out asyncData and fetch to see the differences between them and using Axios.
AsyncData
AsyncData fetches data on the server-side and it’s called before loading the page component. It does not have access to this because it is called before your page component data is created. this is only available after the created hook has been called so Nuxt.js automatically merges the returned data into the component’s data. Using asyncData is good for SEO because it fetches your site’s content on the server-side and also helps in loading content faster. Note that asyncData method can only be used in the pages folder of your application as it would not work in the components folder. This is because asyncData hook gets called before your component is created.
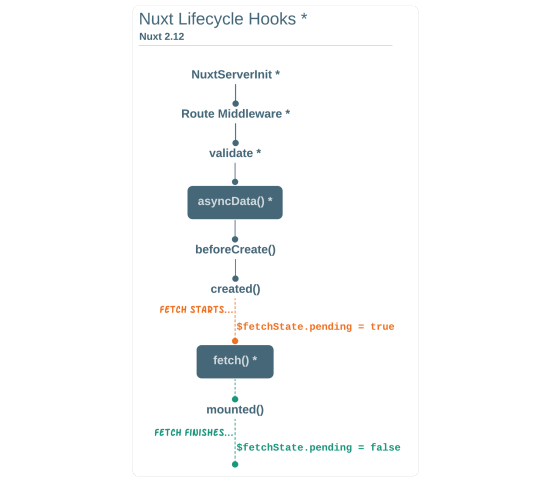
Image from Nuxt blog. (Large preview)
Let us add asyncData to our index.vue file and observe how fast our incidents data loads. Add the following code after our components property and let us get rid of our mounted hook.
async asyncData({ $axios }) { let { data } = await $axios.get("/incidents"); return { incidents: data.data.incidents }; }, // mounted() { // this.getIncidents(); // },
Here, the asyncData method accepts a property from the context $axios. We use this property to fetch the list of incidents and the value is then returned. This value is automatically injected into our component. Now, you can notice how fast your content loads if you refresh the page and at no time is there no incident to render.
Fetch
The Fetch method is also used to make requests on the server-side. It is called after the created hook in the life cycle which means it has access to the component’s data. Unlike the asyncData method, the fetch method can be used in all .vue files and be used with the Vuex store. This means that if you have the following in your data function.
data() { return { incidents: [], id: 5, gender: 'male' }; }
You can easily modify id or gender by calling this.id or this.gender.
Using Axios As A Plugin
During the process of development with Axios, you might find that you need extra configuration like creating instances and interceptors for your request so your application can work as intended and thankfully, we can do that by extending our Axios into a plugin. To extend axios, you have to create a plugin (e.g. axios.js) in your plugins folder.
export default function ({ $axios, store, redirect }) { $axios.onError(error => { if (error.response && error.response.status === 500) { redirect('/login') } }) $axios.interceptors.response.use( response => { if (response.status === 200) { if (response.request.responseURL && response.request.responseURL.includes('login')) { store.dispatch("setUser", response); } } return response } ) }
This is an example of a plugin I wrote for a Nuxt application. Here, your function takes in a context object of $axios, store and redirect which we would use in configuring the plugin. The first thing we do is to listen for an error with a status of 500 using $axios.onError and redirect the user to the login page. We also have an interceptor that intercepts every request response we make in our application checks if the status of the response we get is 200. If that is true we proceed and check that there is a response.request.responseURL and if it includes login. If this checks out to be true, we then send this response using our store’s dispatch method where it then mutated in our state. Add this plugin to your nuxt.config.js file:
plugins: [ '~/plugins/axios' ]
After doing this, your Axios plugin would intercept any request you make and check if you have defined a special case for it.
Introduction To The Auth Module
The auth module is used for performing authentication for your Nuxt application and can be accessed from anywhere in your application using $this.auth. It is also available in fetch, asyncData, middleware and NuxtInitServer from the context object as $auth. The context provides additional objects/params from Nuxt to Vue components and is available in special nuxt lifecycle areas like those mentioned above. To use the auth module in your application, you would have to install it using yarn or npm. YARN
yarn add @nuxtjs/auth
NPM
npm install @nuxtjs/auth
Add it to your nuxt.config.js file.
modules: [ '@nuxtjs/auth' ], auth: { // Options }
The auth property accepts a list of properties such as strategies and redirect. Here, strategies accepts your preferred authentication method which can be:
local For username/email and password-based flow.
facebook For using Facebook accounts as a means of authentication.
Github For authenticating users with Github accounts.
Google For authenticating users with Google accounts.
Auth0
Laravel Passport
The redirect property accepts an object of links for:
login Users would be redirected to this link if login is required.
logout Users would be redirected here if after logout current route is protected.
home Users would be redirected here after login.
Now, let us add the following to our nuxt.config.js file.
/* ** Auth module configuration */ auth: { redirect: { login: '/login', logout: '/', home: '/my-reports' }, strategies: { local: { endpoints: { login: { url: "/user/login", method: "post", propertyName: "data.token", }, logout: false, user: false, }, tokenType: '', tokenName: 'x-auth', autoFetchUser: false }, }, }
Please note that the auth method works best when there is a user endpoint provided in the option above. Inside the auth config object, we have a redirect option in which we set our login route to /login, logout route to / and home route to /my-reports which would all behave as expected. We also have a tokenType property which represents the Authorization type in the header of our Axios request. It is set to Bearer by default and can be changed to work with your API. For our API, there is no token type and this is why we’re going to leave it as an empty string. The tokenName represents the Authorization name (or the header property you want to attach your token to) inside your header in your Axios request. By default, it is set to Authorization but for our API, the Authorization name is x-auth. The autoFetchUser property is used to enable user fetch object using the user endpoint property after login. It is true by default but our API does not have a user endpoint so we have set that to false. For this tutorial, we would be using the local strategy. In our strategies, we have the local option with endpoints for login, user and logout but in our case, we would only use the *login* option because our demo API does not have a *logout* endpoint and our user object is being returned when *login* is successful. Note: The auth module does not have a register endpoint option so that means we’re going to register the traditional way and redirect the user to the login page where we will perform the authentication using this.$auth.loginWith. This is the method used in authenticating your users. It accepts a ‘strategy’ (e.g local) as a first argument and then an object to perform this authentication with. Take a look at the following example.
let data { email: '[email protected]', password: '123456' } this.$auth.loginWith('local', { data })
Using The Auth Module
Now that we have configured our auth module, we can proceed to our registration page. If you visit the /register page, you should see a registration form.
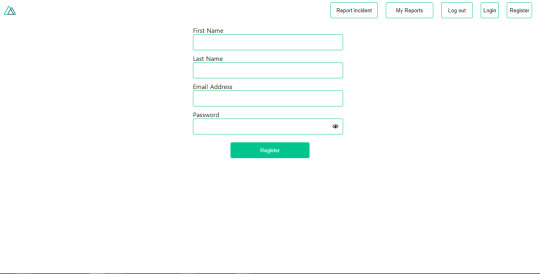
Register page. (Large preview)
Let us make this form functional by adding the following code:
methods: { async registerUser() { this.loading = true; let data = this.register; try { await this.$axios.post("/user/create", data); this.$router.push("/login"); this.loading = false; this.$notify({ group: "success", title: "Success!", text: "Account created successfully" }); } catch (error) { this.loading = false; this.$notify({ group: "error", title: "Error!", text: error.response ? error.response.data.error : "Sorry an error occured, check your internet" }); } } }
Here, we have an async function called registerUser which is tied to a click event in our template and makes an Axios request wrapped in a try/catch block to an endpoint /user/create. This redirects to the /login page and notifies the user of a successful registration. We also have a catch block that alerts the user of any error if the request is not successful. If the registration is successful, you would be redirected to the login page.
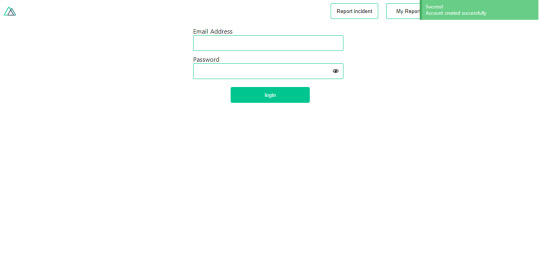
Login page with notification component. (Large preview)
Here, we’re going to make use of auth authentication method this.$auth.loginWith('local', loginData) after which we would use the this.$auth.setUser(userObj) to set the user in our auth instance. To get the login page working, let’s add the following code to our login.vue file.
methods: { async logIn() { let data = this.login; this.loading = true; try { let res = await this.$auth.loginWith("local", { data }); this.loading = false; let user = res.data.data.user; this.$auth.setUser(user); this.$notify({ group: "success", title: "Success!", text: "Welcome!" }); } catch (error) { this.loading = false; this.$notify({ group: "error", title: "Error!", text: error.response ? error.response.data.error : "Sorry an error occured, check your internet" }); } } }
We created an async function called logIn using the auth method this.$auth.loginWith('local, loginData). If this login attempt is successful, we then assign the user data to our auth instance using this.$auth.setUser(userInfo) and redirect the user to the /my-report page. You can now get user data using this.$auth.user or with Vuex using this.$store.state.auth.user but that’s not all. The auth instance contains some other properties which you can see if you log in or check your state using your Vue dev tools. If you log this.$store.state.auth to the console, you’ll see this:
{ "auth": { "user": { "id": "d7a5efdf-0c29-48aa-9255-be818301d602", "email": "[email protected]", "lastName": "Xo", "firstName": "Tm", "othernames": null, "isAdmin": false, "phoneNumber": null, "username": null }, "loggedIn": true, "strategy": "local", "busy": false } }
The auth instance contains a loggedIn property that is useful in switching between authenticated links in the nav/header section of your application. It also contains a strategy method that states the type of strategy the instance is running (e.g local). Now, we will make use of this loggedIn property to arrange our nav links. Update your navBar component to the following:
<template> <header class="header"> <div class="logo"> <nuxt-link to="/"> <Logo /> </nuxt-link> </div> <nav class="nav"> <div class="nav__user" v-if="auth.loggedIn"> <p></p> <button class="nav__link nav__link--long"> <nuxt-link to="/report-incident">Report incident</nuxt-link> </button> <button class="nav__link nav__link--long"> <nuxt-link to="/my-reports">My Reports</nuxt-link> </button> <button class="nav__link" @click.prevent="logOut">Log out</button> </div> <button class="nav__link" v-if="!auth.loggedIn"> <nuxt-link to="/login">Login</nuxt-link> </button> <button class="nav__link" v-if="!auth.loggedIn"> <nuxt-link to="/register">Register</nuxt-link> </button> </nav> </header> </template> <script> import { mapState } from "vuex"; import Logo from "@/components/Logo"; export default { name: "nav-bar", data() { return {}; }, computed: { ...mapState(["auth"]) }, methods: { logOut() { this.$store.dispatch("logOut"); this.$router.push("/login"); } }, components: { Logo } }; </script> <style></style>
In our template section, we have several links to different parts of the application in which we are now using auth.loggedIn to display the appropriate links depending on the authentication status. We have a logout button that has a click event with a logOut() function attached to it. We also display the user’s email gotten from the auth property which is accessed from our Vuex store using the mapState method which maps our state auth to the computed property of the nav component. We also have a logout method that calls our Vuex action logOut and redirects the user to the login page. Now, let us go ahead and update our store to have a logOut action.
export const actions = { // .... logOut() { this.$auth.logout(); } }
The logOut action calls the auth logout method which clears user data, deletes tokens from localStorage and sets loggedIn to false. Routes like /my-reports and report-incident should not be visible to guests but at this point in our app, that is not the case. Nuxt does not have a navigation guard that can protect your routes, but it has is the auth middleware. It gives you the freedom to create your own middleware so you can configure it to work the way you want. It can be set in two ways:
Per route.
Globally for the whole app in your nuxt.config.js file.
router: { middleware: ['auth'] }
This auth middleware works with your auth instance so you do not need to create an auth.js file in your middleware folder. Let us now add this middleware to our my-reports.vue and report-incident.vue files. Add the following lines of code to the script section of each file.
middleware: 'auth'
Now, our application would check if the user trying to access these routes has an auth.loggedIn value of true. It’ll redirect them to the login page using our redirect option in our auth config file — if you’re not logged in and you try to visit either /my-report or report-incident, you would be redirected to /login. If you go to /report-incidents, this is what you should see.
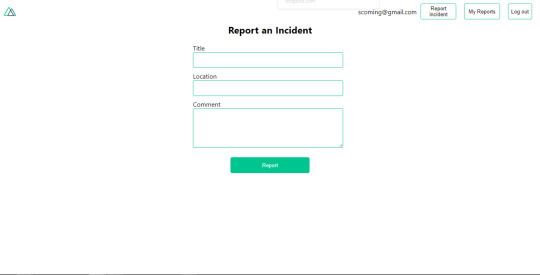
Report incident page. (Large preview)
This page is for adding incidents but that right now the form does not send incident to our server because we are not making the call to the server when the user attempts to submit the form. To solve this, we will add a reportIncident method which will be called when the user clicks on Report. We’ll have this in the script section of the component. This method will send the form data to the server. Update your report-incident.vue file with the following:
<template> <section class="report"> <h1 class="report__heading">Report an Incident</h1> <form class="report__form"> <div class="input__container"> <label for="title" class="input__label">Title</label> <input type="text" name="title" id="title" v-model="incident.title" class="input__field" required /> </div> <div class="input__container"> <label for="location" class="input__label">Location</label> <input type="text" name="location" id="location" v-model="incident.location" required class="input__field" /> </div> <div class="input__container"> <label for="comment" class="input__label">Comment</label> <textarea name="comment" id="comment" v-model="incident.comment" class="input__area" cols="30" rows="10" required ></textarea> </div> <input type="submit" value="Report" class="input__button" @click.prevent="reportIncident" /> <p class="loading__indicator" v-if="loading">Please wait....</p> </form> </section> </template> <script> export default { name: "report-incident", middleware: "auth", data() { return { loading: false, incident: { type: "red-flag", title: "", location: "", comment: "" } }; }, methods: { async reportIncident() { let data = this.incident; let formData = new FormData(); formData.append("title", data.title); formData.append("type", data.type); formData.append("location", data.location); formData.append("comment", data.comment); this.loading = true; try { let res = await this.$store.dispatch("reportIncident", formData); this.$notify({ group: "success", title: "Success", text: "Incident reported successfully!" }); this.loading = false; this.$router.push("/my-reports"); } catch (error) { this.loading = false; this.$notify({ group: "error", title: "Error!", text: error.response ? error.response.data.error : "Sorry an error occured, check your internet" }); } } } }; </script> <style> </style>
Here, we have a form with input fields for title, location, and comment with two-way data binding using v-model. We also have a submit button with a click event. In the script section, we have a reportIncident method that collects all the information provided in the form and is sent to our server using FormData because the API is designed to also accept images and videos. This formData is attached to a Vuex action using the dispatch method, if the request is successful, you get redirected to /my-reports with a notification informing you that this request was successful otherwise, you would be notified of an error with the error message. At this point, we don’t have reportIncident action in our store yet so in your browser console, you would see an error if you try to click submit on this page.

Vuex error message. (Large preview)
To fix this, add the reportIncident action your index.js file.
export const actions = { // ... async reportIncident({}, data) { let res = await this.$axios.post('/incident/create', data) return res; } }
Here, we have a reportIncident function that takes in an empty context object and the data we’re sending from our form. This data is then attached to a post request that creates an incident and returns back to our report-incident.vue file. At this point, you should be able to add a report using the form after which you would be redirected to /my-reports page.
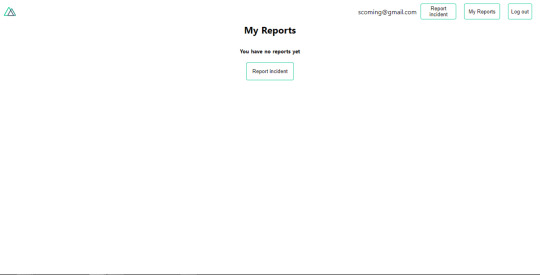
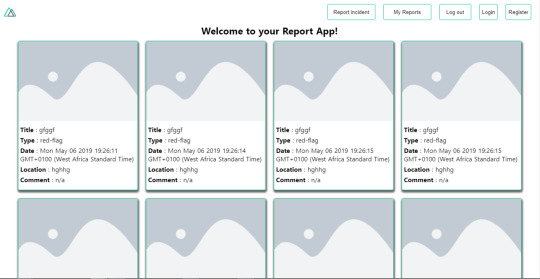
My reports page empty. (Large preview)
This page should display a list of incidents created by the user but right now it only shows what we see above, let’s go ahead to fix that. We’re going to be using the fetch method we learned about to get this list. Update your my-reports.vue file with the following:
<script> import incidentCard from "@/components/incidentCard.vue"; export default { middleware: "auth", name: "my-reports", data() { return { incidents: [] }; }, components: { incidentCard }, async fetch() { let { data } = await this.$axios.get("/user/incidents"); this.incidents = data.data; } }; </script>
Here, we use fetch method to get user-specific incidents and assign the response to our incidents array. If you refresh your page after adding an incident, you should see something like this.
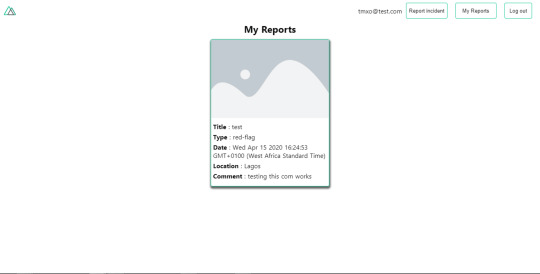
My Reports page with a report. (Large preview)
At this point, we would notice a difference in how fetch method and asyncData loads our data.
Conclusion
So far, we have learned about the Axios module and all of its features. We have also learned more about asyncData, and how we can fetch both of them together despite their differences. We’ve also learned how to perform authentication in our application using the auth module and how to use the auth middleware to protect our routes. Here are some useful resources that talk more about all we’ve covered.
Getting started with meta tags in Nuxjs.
Using the dotenv module in Nuxt.
Using Fetch in your Nuxt app.
Getting started with asyncData.
0 notes
Text
Laravel 9 Socialite Login with Facebook Tutorial

How to use Facebook to log into a Laravel application. If you have the same query, keep reading; in this article, we'll learn how to use the Socialite package in Laravel to log in with a Facebook social media account. The Laravel Socialite package allows you to create a strong, expressive OAuth authentication interface with a variety of social media networks, including Facebook, Twitter, Google, LinkedIn, GitHub, GitLab, and Bitbucket. Its user-centric boilerplate social authentication technique saves you time. Logging in with social accounts is a simple process that improves the user experience; nowadays, everyone understands that a better user experience is critical to the success of any digital product. The user's anticipation to access and register within the application is pushed ahead by social login. As a result, we're adding a simple Facebook login capability to the Laravel application. For this lesson, we'll need authentication user interface templates, and we'll be utilizing Laravel Jetstream to automate the process. Laravel Jetstream is a well created authentication scaffolding built using Tailwind CSS; you can also use Livewire or Inertia scaffolding to create auth templates. It supports Laravel by providing login, registration, email verification, two-factor authentication, session management, and API support. Incredible, isn’t it? Let’s start integrating Login with Facebook in the Laravel application.
1. Set Up Laravel Environment
composer create-project laravel/laravel --prefer-dist laravel-socialite-login-facebook-example Take a look inside the project: cd laravel-socialite-login-facebook-example
2. Add Database Details
Enter the database name, user name, and password for your database in the.env file. DB_CONNECTION=mysql DB_HOST=127.0.0.1 DB_PORT=3306 DB_DATABASE=database_name DB_USERNAME=root DB_PASSWORD=
3. Setting up Jetstream in Laravel
Jetstream may be installed with the following command: composer require laravel/jetstream Execute command to generate authentication templates such as login, register and email verification. php artisan jetstream:install livewire Next, run below command. npm install Using the node package manager, run dev packages. npm run dev To migrate authentication properties, run the command. php artisan migrate
4. Install Socialite Package in Laravel
With the following line, you can install the socialite package in Laravel. composer require laravel/socialite Register the socialite plugin in the providers and aliases array in config/app.php. .... .... 'providers' => , 'aliases' => , .... ....
5. Add Facebook ID in Users Table
We need to keep adding the Facebook id to the users table. php artisan make:migration add_fb_id_column_in_users_table --table=users Go to the newly generated file. migrations/timestamp_add_fb_id_column_in_users_table.php file, add the fb_id column value. Read the full article
0 notes
Text
Vanguard - Advanced PHP Login and User Management
New Post has been published on https://intramate.com/php-scripts/vanguard-advanced-php-login-and-user-management/
Vanguard - Advanced PHP Login and User Management
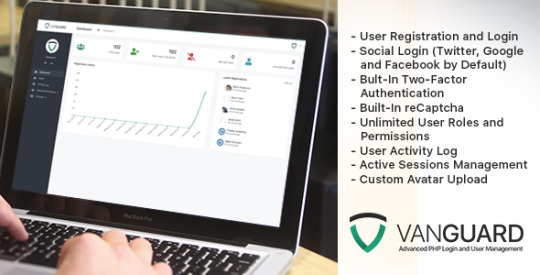
LIVE PREVIEWGet it now for only $35
Vanguard is PHP application, written in Laravel PHP framework, that allows website owners to quickly add and enable authentication, authorization and user management to their website. It is designed following latest security and code standards and it is ready for high availability websites. Although it is written in Laravel, it can be used to provide secure login, authentication, authorization and complete user management for any PHP powered website. Vanguard also comes with fully documented JSON API which allows you to easily authenticate users from your mobile (or any other) application.
It comes with almost three hundred automated tests (functional and unit), that cover all vital parts of the application and the API and ensures it’s maintainability and stability.
Version 5.0.1
Features
Secure user registration and login
Social Authentication using Facebook, Twitter and Google+
Password reset
Two-Factor Authentication
Remember Me feature on login
Login with email or username
Google reCAPTCHA on registration
Authentication Throttling (lock user account after few incorrect login attempts)
Interactive Dashboard
Unlimited number of user roles
Powerful admin panel
Unlimited number of permissions
Manage permissions from admin interface
Assign permission to roles
Easily check if user has permission to perform some action
JSON API to build any kind of applications around Vanguard
Super easy installation using installation wizard
User Activity Log
Avatar upload with crop feature
Built using Bootstrap 4
Active Sessions Management (see and manage all your active sessions)
Admins can impersonate users
Full unicode support
Client side and server side form validation
Fully customisable from settings section
Complete and detailed documentation
Fully object oriented and commented PHP and JavaScript code.
Localization support – Translate the application to any language (English, Serbian and German translations included)
Runs on PHP 7.2.5+
Flexible Plugin System
Security
CSRF Protection – all forms include CSRF token
Session Protection – highly secure Laravel session mechanism
Highly secure one-way password hashing
Server Requirements
PHP >= 7.2.5
BCMath PHP Extension
OpenSSL PHP Extension
PDO PHP Extension
Mbstring PHP Extension
Tokenizer PHP Extension
Ctype PHP Extension
XML PHP Extension
JSON PHP Extension
GD PHP Extension
Fileinfo PHP Extension
Demo and Documentation
Demo link: https://demo.vanguardapp.io
Admin Credentials
Username: admin
Password: admin123
Documentation and Support: https://milos.support-hub.io/
Discount Notifications
Subscribe to receive notifications about discounts and updates: https://vanguardapp.io/#subscribe
Changelog
Check the docs for upgrade guide.
April 8, 2020 – Version 5.0.1
Fixed installation wizard
April 5, 2020 – Version 5.0.0
Fixed custom login redirect issue Upgraded to Laravel 7 Switched to Laravel Sanctum for API authentication Replaced API transformers with Laravel's API Resources Changed API response format
September 16, 2019 – Version 4.0.1
Fixed password reset email issue Fixed avatar upload issue Updated registration and email verification flow
September 13, 2019 – Version 4.0.0
Added Plugin Support Upgraded to Laravel 6
April 1, 2019 – Version 3.2.1
Fix installation issue
March 30, 2019 – Version 3.2.0
Upgraded to Laravel 5.8 Replaced deprecated Larvel str_ and array_ helper functions
October 30, 2018 – Version 3.1.0
Upgraded to Laravel 5.7 Fixed issue with API when country_id field is null Fixed Notifications Settings update bug Improved Two-Factor Authentication by adding one more step for phone verification Added Impersonate feature
June 14, 2018 – Version 3.0.1
Minor bug-fix release to address a few mostly UI related bugs. List of changed files available inside the upgrade guide.
May 17, 2018 – Version 3.0.0
Complete frontend re-write with Bootstrap 4 Remove additional step for Twitter authentication since Twitter can provide an email now Update sizes of the avatars retreived during social authentication
March 13, 2018 – Version 2.2.0
Upgrade to Laravel 5.6 Fix issue with Authy secret key and config caching Fix issues with registration history chart Fix installation issue on PHP 7.2
December 19, 2017 – Version 2.1.1
Added ability to configure dates format across the app Added automatic session invalidation and log out of the user if he is banned by the administrator Added device info on session list page Updated dashboard chart to display data in last 365 days (instead of for current year) Extracted model factories to different files (important for testing purposes only) Fixed autoload include issue for existing websites
November 08, 2017 – Version 2.1.0
Upgrade Laravel to version 5.5 Fix glitch on User Acivity search
September 14, 2017 – Version 2.0.2
Fix avatar update issue when admin is updating avatar for some other user Disable API authentication for banned and unconfirmed users Fix country update issue which occures on some MySQL versions
August 25, 2017 – Version 2.0.1
Fix installation issues from previous version Update documentation
August 23, 2017 – Version 2.0.0
Add fully tested JSON API Fix some minor glitches related to translation
May 1, 2017 – Version 1.3.3
Fix incompatibility issues between laravel-jsvalidation package and Laravel Framework version 5.4.19+ Fix issue where country is set to null after user logs in
April 12, 2017 – Version 1.3.2
Removed zizaco/entrust package and replaced with Vanguard's native mechanism for handling roles and permissions $user->can() method now use Laravel's default authorization mechanism. For checking if user has permission defined by Vanguard, you should use $user->hasPermission('...').
March 06, 2017 – Version 1.3.1
Fixed installation issue Fixed issue with FORCE_SSL
February 18, 2017 – Version 1.3.0
Laravel 5.4 upgrade IMPORTANT: Fixed potential security issue with user avatar upload Fixed issue to don't allow banned users to log in via social networks Expanded and updated automated tests to cover all bugs and issues from above
September 30, 2016 – Version 1.2.1
Fixed bug when creating/updating users from admin panel without selected country Fixed small typos on delete user confirmation popup
September 27, 2016 – Version 1.2.0
Updated to Laravel 5.3 InnoDB is now forced storage engine for MySQL database Slightly improved design E-Mail templates updated (now using Laravel 5.3 Notifications feature) Fixed default country value Fixed n+1 problem for activity page (added missing eager loading) Fixed translation glitches Added IIS configuration file PHP 5.6.4 is now minimum PHP version required (Laravel 5.3 requirement) PHP XML extension is now requirement (Laravel 5.3 requirement) Updated and extended documentation Dropped support for HHVM, since Laravel 5.3 does not support it
March 30, 2016 – Version 1.1.2
Add missing middleware to redirect user to install page if Vanguard is not installed
March 29, 2016 – Version 1.1.1
Added German translation files Add translation for few missed strings Fix some small bugs
March 15, 2016 – Version 1.1.0
Add localization support Use social network profile image as default avatar after social auth Fix problems with pagination while browsing search results for users and activities Handle missing email from non-twitter social provider
February 18, 2016 – Version 1.0.4
Updated documentation Added option to allow redirect to custom page after login Disable access to login page for authenticated users
February 4, 2016 – Version 1.0.3
Updated documentation Fixed css glitches Added more tests
January 25, 2016 – Version 1.0.2
New design for error pages Updated installer to require Fileinfo extension
January 22, 2016 – Version 1.0.1
Add missing configuration placeholder file
January 21, 2016 – Version 1.0.0
First release
LIVE PREVIEWGet it now for only $35
0 notes
Link
0 notes